Integrating LLM features without the hassle
5 ways PlayFetch makes your life as a developer easier
If you’d like to join the waitlist for access to PlayFetch you can do so here. If you’d like to get in touch with us directly please send an email to hello at playfetch dot ai.
We have previously written about how PlayFetch helps you iterate quickly on LLM prompts, collaborate with other team members of your team, and test new versions to determine whether they outperform previous ones. Today we will take a closer look at how to integrate these features into your app.
We will show how to configure a chatbot prompt in PlayFetch, integrate it in a modern Next.js app and deploy it to Vercel with just a few clicks. We will also cover some of the benefits that this approach offers for developers, compared to integrating LLM APIs directly (as we did for Dreambooks):
Reduced dependencies on 3rd party libraries in your code base
No need to include previous conversation messages in your API calls
Implementation details of different LLM streaming APIs are abstracted away
Tweak prompts or switch models without deploying a new version of your app
Get logging and cost tracking for free
1. Configure your prompt
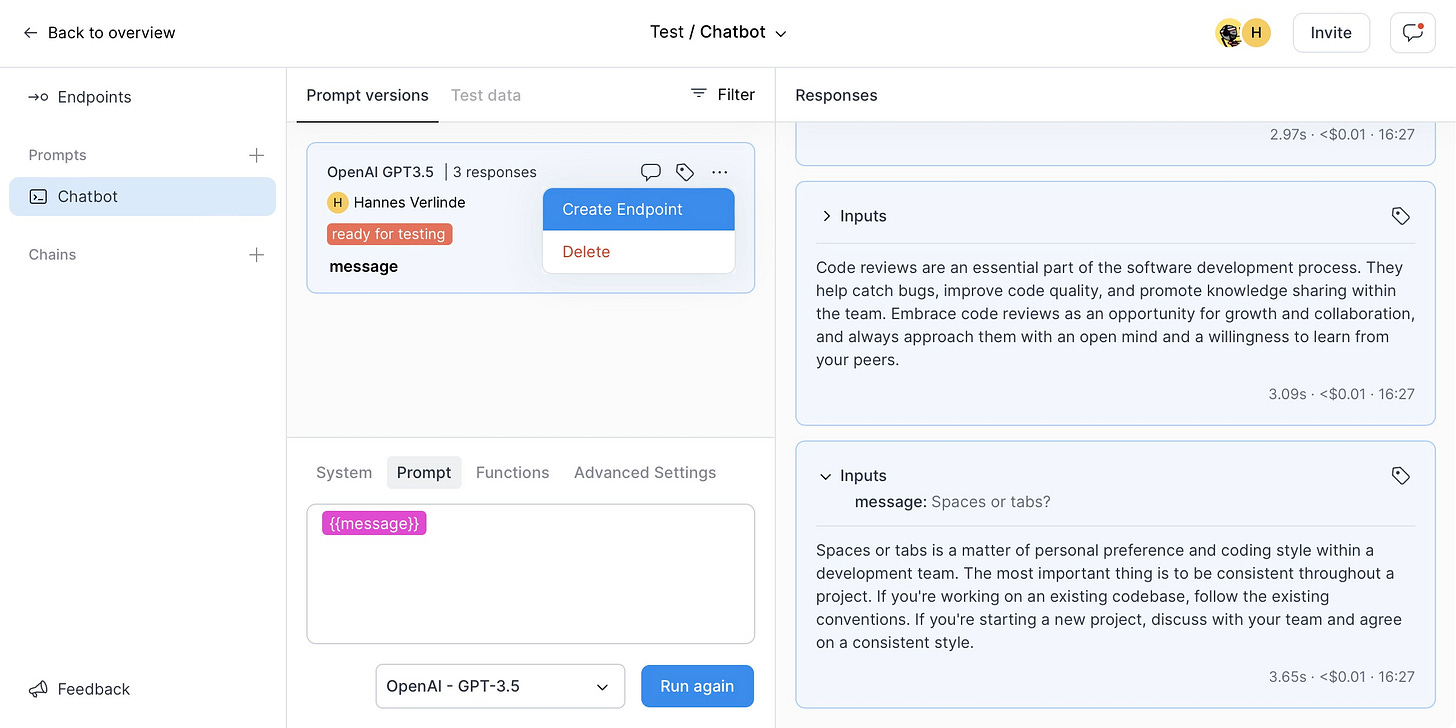
For this example app, we want to configure a simple chat prompt. We create a new project in PlayFetch, pick OpenAI GPT-3.5 as the LLM model, tweak the personality of our chatbot in the System prompt, and add a message input variable to our main prompt. We also run the prompt with some Test data to make sure it generates sensible responses:
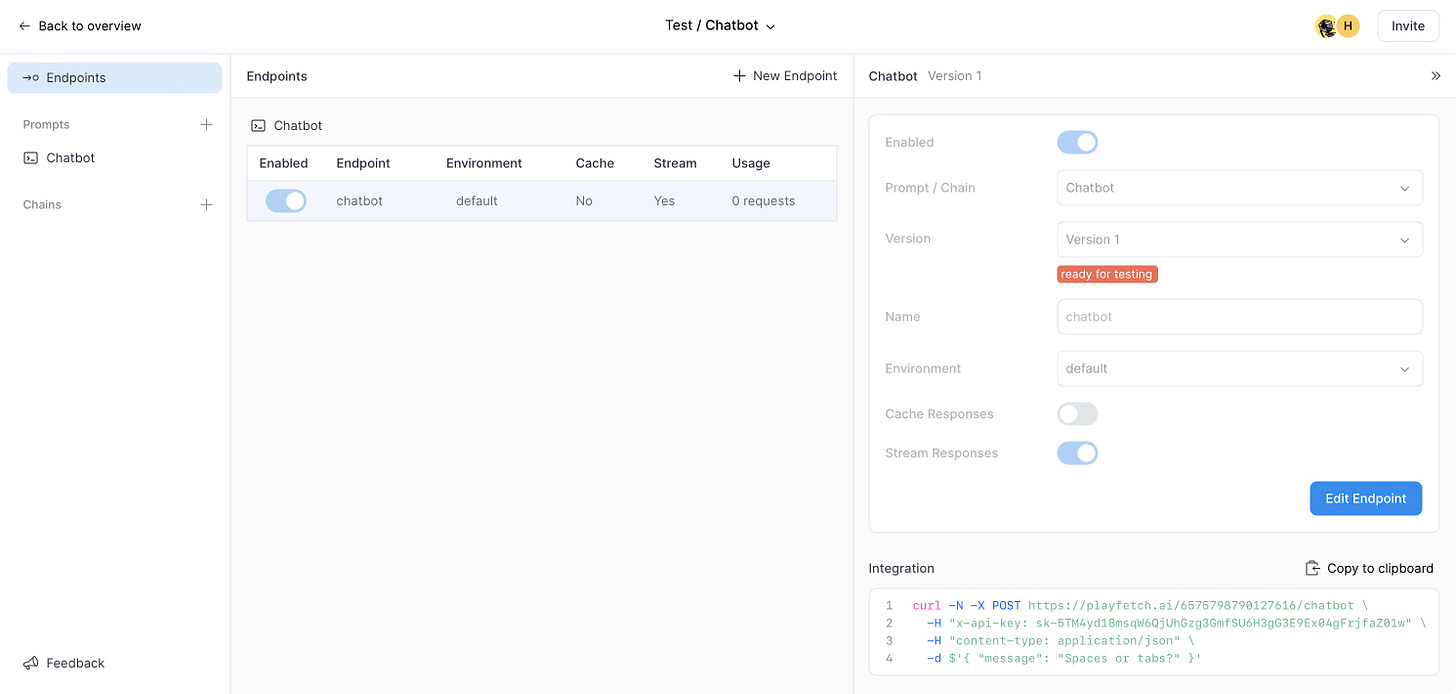
Next we create an endpoint from this prompt version, making sure to enable the Stream Responses option. We also note down the endpoint URL and API key from the Integration panel as we will need these later on:
2. Build your application
The full code for this example is available on Github, but here we will show how to recreate it from scratch. We start from a vanilla Next.js app by running the following command and accepting all the default settings:
$ npx create-next-app@latest
✔ What is your project named? … playfetch-chatbot-demo
✔ Would you like to use TypeScript? … Yes
✔ Would you like to use ESLint? … Yes
✔ Would you like to use Tailwind CSS? … Yes
✔ Would you like to use `src/` directory? … No
✔ Would you like to use App Router? (recommended) … Yes
✔ Would you like to customize the default import alias? … No
Creating a new Next.js app in ~/playfetch-chatbot-demo.
Next we add a single route handler to the project to call our PlayFetch chatbot endpoint and forward the response to the client. This is straightforward and you don’t need to rely on any external SDKs or 3rd-party libraries. In theory we could even skip this step and call our PlayFetch endpoint directly from the client code, but this wouldn’t be following best practices as it would potentially leak our PlayFetch API key and would require overriding some default CORS policies as well. So instead we add the following file (~/playfetch-chatbot-demo/app/api/sendMessage/route.ts):
import { NextRequest, NextResponse } from 'next/server'

export const runtime = 'edge'

export async function POST(request: NextRequest) {
  if (!process.env.PLAYFETCH_API_KEY || !process.env.PLAYFETCH_URL) {
    return new NextResponse('Configuration issue', { status: 500 })
  }

  const { message, conversationID } = await request.json()

  const response = await fetch(process.env.PLAYFETCH_URL, {
    method: 'POST',
    headers: {
      'content-type': 'application/json',
      'x-api-key': process.env.PLAYFETCH_API_KEY,
      'x-continuation-key': conversationID,
    },
    body: JSON.stringify({ message }),
  })

  return new NextResponse(response.body)
}
This code will run on the server (as an Edge Function when deployed on Vercel), load the PlayFetch endpoint URL and API key from the environment, send a POST request to the endpoint and return the response as a stream. One thing to note is that, in addition to the message body, we also include a conversation ID in the request (as an x-continuation-key header). This is used by PlayFetch to save and restore the state of a conversation so you don’t need to keep track of this manually and you only need to send the last new message in each request.
Next, let’s take a look at the client code, where we replace the default page.tsx with the following content:
'use client'

import { useState } from 'react'

export default function Home() {
  const [messages, setMessages] = useState<string[]>([])
  const [message, setMessage] = useState('')
  const [conversationID] = useState(
    new Uint32Array(Float64Array.of(Math.random()).buffer)[0].toString()
  )

  const sendMessage = async () => {
    setMessages([...messages, message])
    setMessage('')
    const response = await fetch('/api/sendMessage', {
      method: 'POST',
      body: JSON.stringify({ message, conversationID }),
    })
    await readStream(
      response.body,
      text => setMessages([...messages, message, text])
    )
  }

  return (
    <main className='flex flex-col h-screen gap-4 p-4 overflow-y-auto'>
      {messages.map((message, index) =>
        <div key={index}>
          {index % 2 ? 'Assistant' : 'You'}: {message}
        </div>)}
      <input
        className='p-2 rounded'
        value={message}
        onChange={event => setMessage(event.target.value)} />
      <button
        className='p-2 text-white bg-blue-500 rounded'
        onClick={sendMessage}>
        Send Message
      </button>
    </main>
  )
}

const readStream = async (
  stream: ReadableStream<Uint8Array> | null,
  callback: (text: string) => void
) => {
  const reader = stream?.getReader()
  const decoder = new TextDecoder()
  let result, text = ''
  while (reader && !result?.done) {
    result = await reader.read()
    callback(text += decoder.decode(result.value))
  }
}
We’re obviously trying to keep things simple here: the state of our app consists of three variables: the list of messages to display, the current message content of the text input, and the unique conversation ID which we initialise with a random number string when we load the page. The UI is just a flex box with a list of messages, an input field, and a submit button. The button triggers the sendMessage function which calls our endpoint and updates the state of our messages accordingly.
We’ve also added a basic readStream helper function to decode the chunks that get streamed from the endpoint, so we can see the last message updating before the response is completed. Again the code is very straightforward and you don’t need to worry about implementation details of different streaming APIs used by the various LLM providers as those are abstracted away for you.
3. Time to deploy
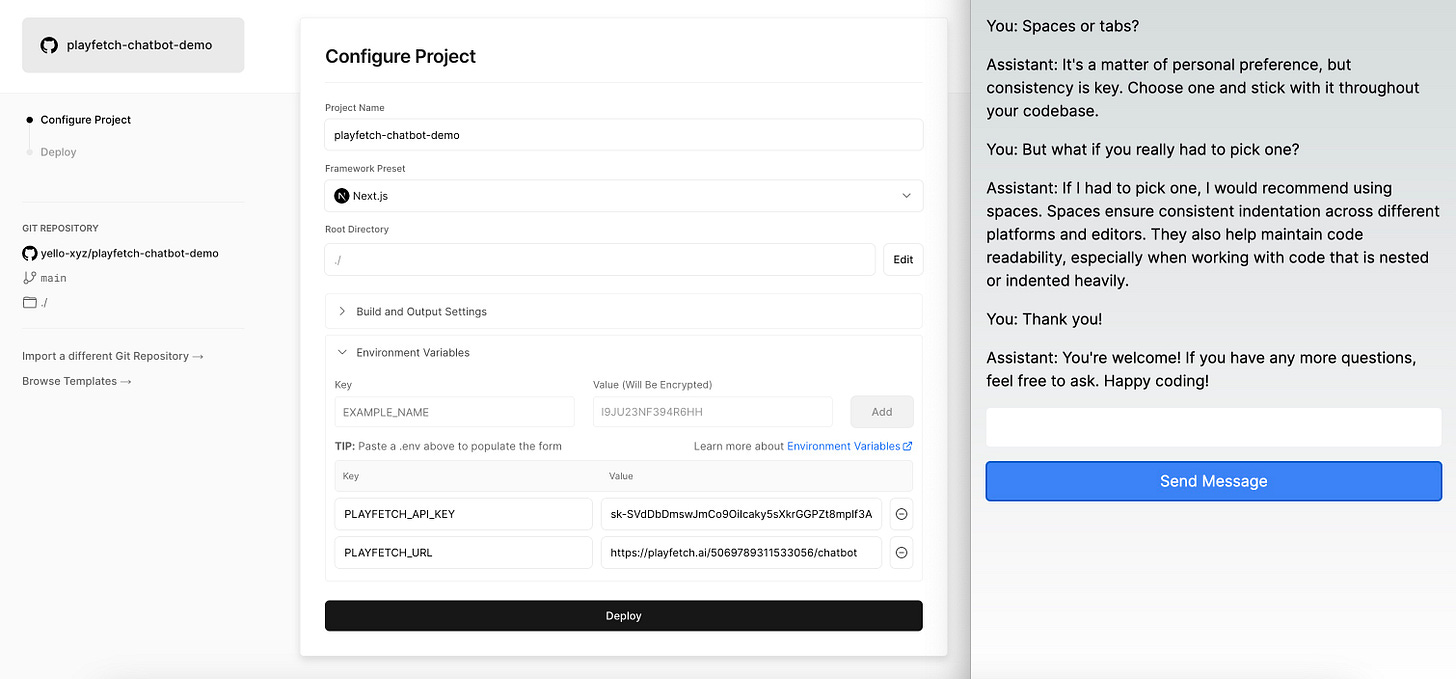
You can of course run this project locally, but in order to share your chatbot with rest of the world, you can import the Github repository in Vercel, paste in the values for the two environment variables you noted down in Step 1 above, and click Deploy. And that’s really it. Of course we have taken a few shortcuts on things like error handling and design, but you are now ready to start chatting to your customised personal assistant:
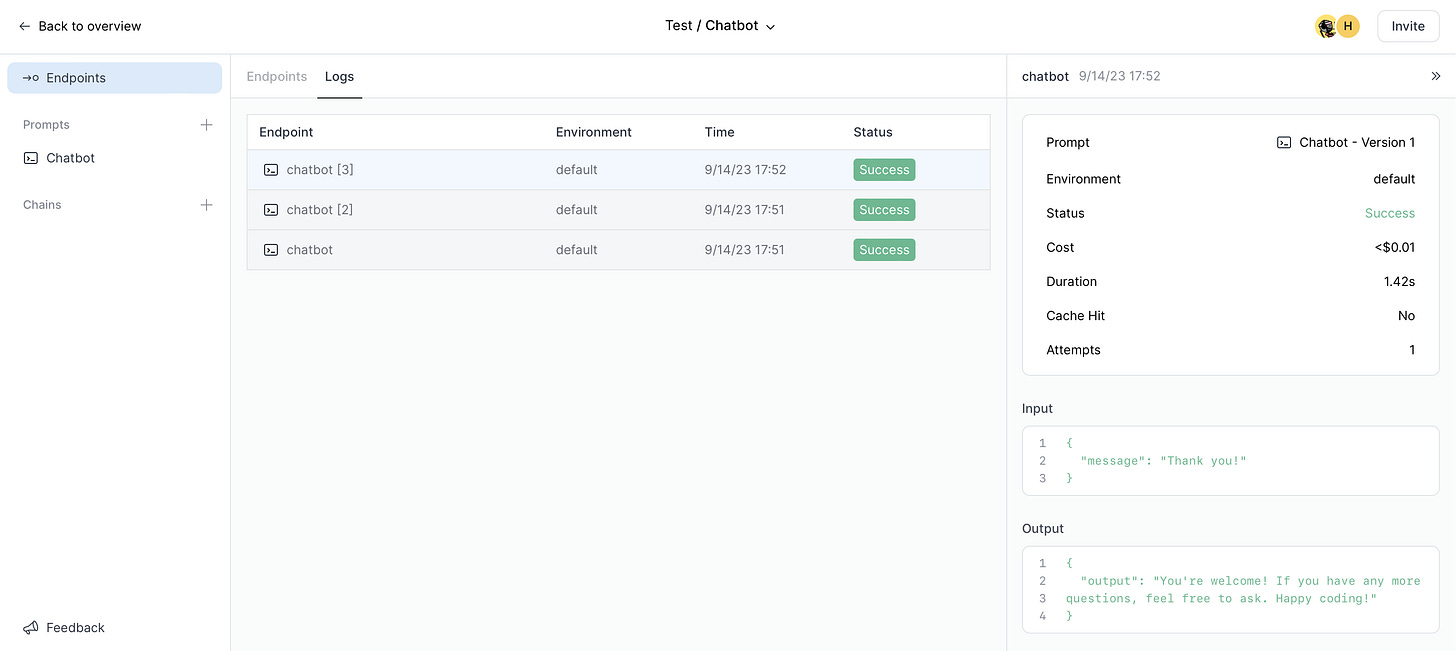
Note that you can further tweak your prompt in PlayFetch without having to deploy a new version of your app, or you can have other people on your team do this without needing to give them constant access to the code base (or to you, more likely). You can even switch the model for your prompt endpoint from GPT to Anthropic Claude and everything will keep working seamlessly without needing to make any code changes. You also automatically get logging and cost tracking for your endpoint:
Hopefully this gives you a sense of how easy it is to integrate LLM features into your app when using PlayFetch, what some of the key benefits are for you as a software developer and how it can improve collaboration with the rest of your team.
If you want to try this along with all of the other features of PlayFetch you can join the waitlist here. If you’d like to get in touch with us directly please send an email to hello at playfetch dot ai.


